The beauty of this recipe is its absolute simplicity. You likely have everything you need right in your pantry and fridge.
The Shortcake Biscuits:
2 cups all-purpose flour
¼ cup granulated sugar (plus 2 extra tablespoons for sprinkling on top)
1 tablespoon baking powder & ½ teaspoon salt
½ cup (1 stick) unsalted butter, ice cold and cubed: Crucial note: Do not let the butter soften! Cold butter is the secret to flaky layers.
¾ cup cold buttermilk: (Or ¾ cup milk mixed with 1 tablespoon of vinegar or lemon juice, left to sit for 5 minutes).
1 teaspoon pure vanilla extract
The Classic Topping:
1 lb fresh strawberries, hulled and sliced
2 tablespoons granulated sugar (to macerate the berries and draw out their natural juices)
1 cup heavy whipping cream or whipped topping (for serving)
Step-by-Step Instructions
Let’s get baking! I promise this process is incredibly relaxing and straightforward.
1. Macerate the Berries
In a medium bowl, gently toss the sliced strawberries with the 2 tablespoons of sugar. Let them sit at room temperature for at least 20 minutes. Science tip: The sugar draws the moisture out of the berries via osmosis, creating a beautiful, natural syrup that will soak into the shortcake perfectly.
2. Mix the Dry Ingredients
Preheat your oven to 400°F (200°C). Line a baking sheet with parchment paper or a reusable silicone mat. In a large bowl, whisk together the flour, ¼ cup sugar, baking powder, and salt.
3. Cut in the Butter
Add the ice-cold, cubed butter to the flour mixture. Using a pastry cutter, two forks, or your fingertips, quickly work the butter into the flour until the mixture resembles coarse crumbs with some pea-sized butter pieces remaining.
Science tip: Those little visible chunks of butter are exactly what you want! They will melt in the oven and create those glorious, flaky steam pockets.
4. Add the Wet Ingredients
In a small cup, stir the vanilla extract into the cold buttermilk. Pour this over the flour-butter mixture. Using a rubber spatula, gently fold the ingredients together just until a shaggy dough forms. Do not overmix! A few dry spots are perfectly fine.
5. Shape and Bake
Turn the dough out onto a lightly floured surface. Gently pat it into a circle about ¾-inch thick. Use a round biscuit cutter (or a glass) to cut out 6 to 8 biscuits. Gather the scraps, gently pat them together, and cut more.
Place the biscuits on the prepared baking sheet, brush the tops lightly with a little extra buttermilk, and sprinkle generously with the remaining 2 tablespoons of sugar. Bake for 15 to 18 minutes, until deeply golden brown.
6. The Crucial Rest
Remove the pan from the oven and let the shortcakes rest on a wire rack for 10 minutes. Science tip: This allows the internal steam to escape, preventing the bottom of the biscuit from becoming soggy when you add the juicy berries.
Pro Tips, Variations & Serving Ideas
Quick Tips for Success
Keep Everything Cold: If your kitchen is warm, pop the cubed butter and buttermilk in the freezer for 10 minutes before starting.
Handle with Care: The less you touch and knead the dough, the more tender your shortcake will be.
The “Avocado Lover’s” Heart-Healthy Twist!
Since I have a strong personal preference for avocados and incorporate them into almost every single meal (even though my children absolutely do not share my liking for them, which just means I get to enjoy the whole batch!), I always make a split batch for serving.
I’ll serve the classic whipped cream and berries for the family and guests. But for my own plate, I skip the heavy dairy and instead whip up a Sweet Avocado Vanilla Cream. I blend ½ a very ripe avocado with 1 tablespoon of powdered sugar, ½ teaspoon of vanilla extract, and a tiny squeeze of lemon juice until it’s light, fluffy, and pale green.
The cool, creamy, heart-healthy monounsaturated fats are fantastic for relaxing my blood vessels and supporting my circulation (which helps keep those unexplained purple blotches on my arms at bay!). The mild, rich avocado perfectly balances the tart, sweet strawberries without overpowering them, making it a surprisingly elegant and nourishing topping.
How to Serve It (The Interactive Shortcake Bar!)
Since I love setting up interactive food bars at my gatherings, this dessert is the perfect centerpiece for a casual afternoon tea or dinner party.
Split the warm shortcakes in half and arrange them on a beautiful vintage platter. Surround the platter with small, beautiful bowls of interactive toppings so guests can build their own perfect dessert:
A large bowl of the macerated strawberries (and their glorious syrup!).
A bowl of fresh blueberries or raspberries.
A pitcher of traditional whipped cream and a bowl of my sweet avocado vanilla cream.
A small dish of toasted, chopped pecans for a buttery crunch.
My Personal Favorite Pairing: Since I always enjoy pairing my desserts with the right beverage, this bright, sweet, and creamy dessert pairs absolutely beautifully with a light, fruity Moscato, a glass of sparkling Prosecco, or a warm cup of Earl Grey tea. The bright acidity and floral notes cut right through the richness of the cream, creating a perfectly balanced, luxurious bite.
Frequently Asked Questions
Q: Can I make the shortcakes ahead of time?
A: Absolutely! You can bake the shortcakes up to a day in advance. Store them in an airtight container at room temperature. When ready to serve, you can warm them in a 300°F oven for 5 minutes to revive that fresh-baked crispness before splitting and topping.
Q: Can I use frozen strawberries?
A: Yes, but thaw them completely in a strainer over a bowl first, so you can capture all that delicious syrup! Toss the thawed berries with the sugar as directed.
Q: Why did my shortcakes turn out dense and heavy?
A: This almost always happens for one of two reasons: the butter was too warm and melted into the flour before baking, or the dough was overmixed, which developed tough gluten. Keep it cold, and keep it gentle!
Let’s Bring Some Sweet Comfort to the Table!
I truly hope this Old-Fashioned Shortcake brings a little extra joy, lightness, and ease to your next family gathering or quiet evening at home. There is something so deeply satisfying about taking a few simple, humble ingredients and turning them into a show-stopping, nostalgic dessert that tastes like a warm hug from the past. It’s a beautiful reminder that the best food doesn’t need to be complicated; it just needs to be made with a little patience, a lot of love, and a mindful eye on our health.
If you try this recipe, I would absolutely love to hear how it turned out for you! Did you stick to the classic whipped cream, or did you dare to try my heart-healthy sweet avocado cream twist? Drop a comment below to let me know, and please share this recipe with a friend who needs a foolproof, crowd-pleasing dessert idea for their next get-together. Happy baking, and I’ll see you in the kitchen!

Related Posts
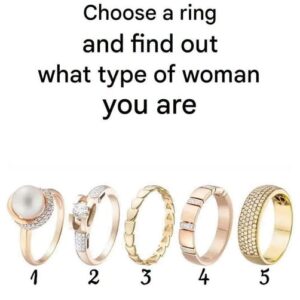
Choose a Ring and Learn More About Yourself
Have you ever been drawn to the simplicity of a pearl? This choice reflects a gentle, refined, and romantic personality. You appreciate classic beauty, calmness, and things…
Choose a Ring and Learn More About Yourself 2
Those who are attracted to intertwined links are often seen as confident and independent. You speak honestly, stand by your values, and are someone others can trust….

With Heavy Hearts, We Inform You Of The Passing Of A Popular Television Star…
The news hit like a punch to the chest. Hal Williams is gone, and with him a rare kind of warmth that once flowed, week after week,…
With Heavy Hearts, We Inform You Of The Passing Of A Popular Television Star… 2
Hal Williams’ life was defined not just by the roles he played, but by the chances he took when everything seemed broken. After a devastating divorce, he…
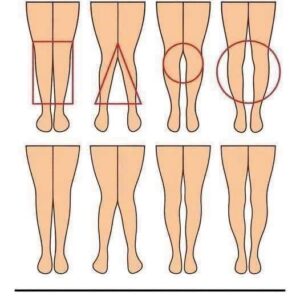
The Subtle Messages Hidden in a Woman’s Legs
Legs don’t just walk you through life—they expose you. In every step, every stance, they whisper stories about confidence, lifestyle, even how you feel about yourself. You…
The Subtle Messages Hidden in a Woman’s Legs 2
We read faces and voices, but legs speak in a quieter language—posture, rhythm, and balance. The way someone plants their feet, shifts their weight, or glides versus…